If you want to create your Google Play account and enroll in the Developer Program for Android apps. With the Google Play Developer Program, the app will be available on the Google Play Store for all Android users.
Steps to set up your Developer Account
To set up your Google Play Developer Account, you will have to follow the steps listed below.
- Go over to Google Play Developer Console and log in using your Google Login.
- Create a developer account for ‘An Organization or Business’.
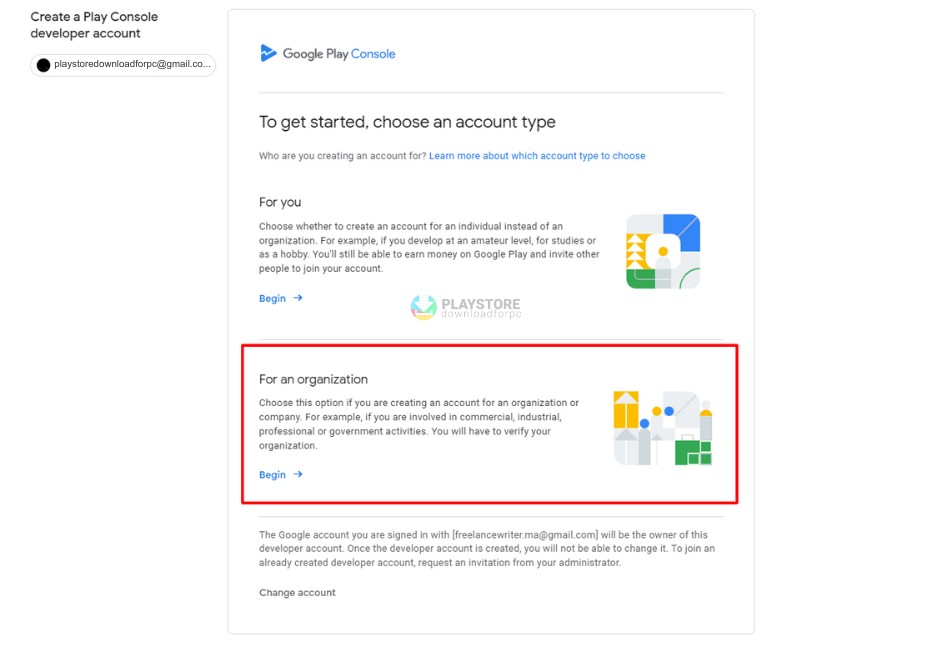
- Now, you will have to insert the details about your organization. You will notice the Developer Name being shown to the users and the Organization name is going to be the legal name.
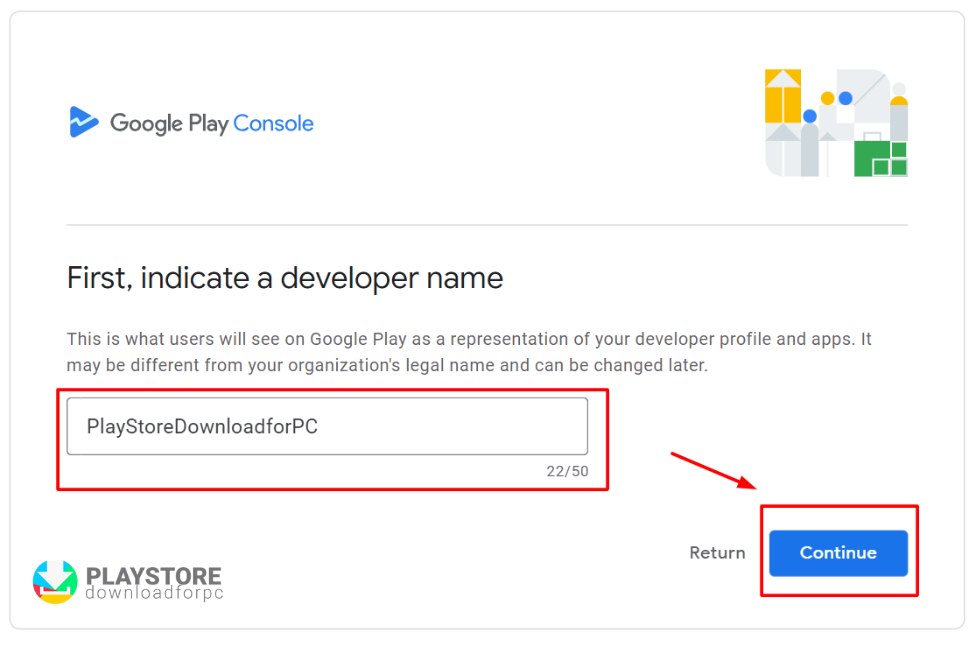
- Agree to the Terms and click on the option ‘Create Account and Pay’.
- Make the payment for the account.
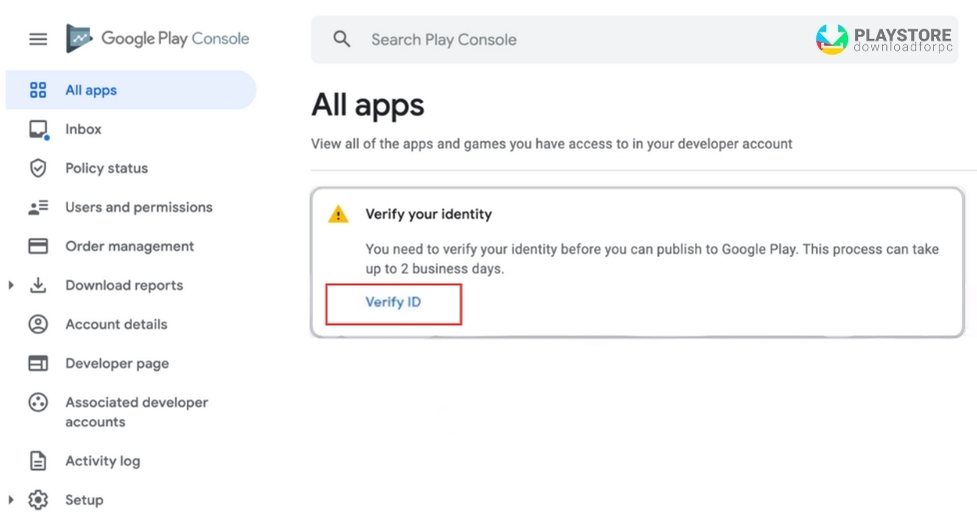
- Verify your ID and after you have paid, you will receive a confirmation that the developer account has been created. However, it is not yet complete. On the screen, you will notice the option to complete the details for verifying the account. You have to click on the option ‘Verify ID’.
- Upload the documents of the organization to verify your ID. Being an organization, you have to verify the details of the organization. When you click on verify ID, you will see a screen saying you should have someone from the company who will be able to submit the documents. Click on the option ‘Begin Verification’.
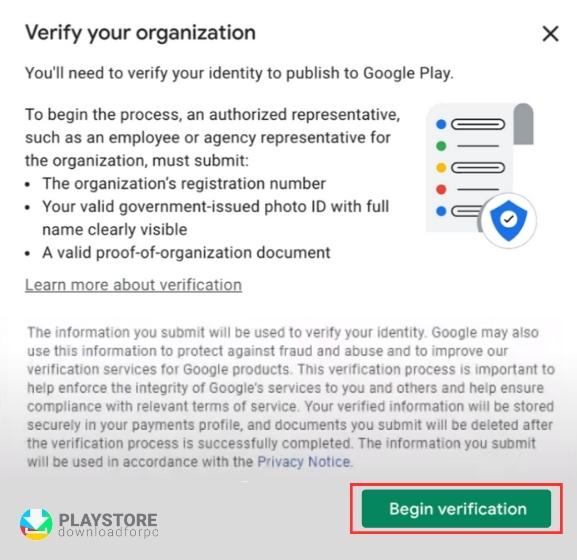
- Upload the identity of the organization. You have to upload company documents or personal identification documents. Do it and submit it. You have to receive a confirmation that tells you about the verification process.
Articles that you may find intesting:
- How to find Alternatives to Google Play Store
- How to Use (Generate) a Redeem Code
- How to install APK Play Store on Android Phone
How to Create and Upload Your App to the Google Play Store?
Here are the steps to create and upload an app on Play Store.
Create a Developer Account
To publish your app on Google Play Store, you have to create your Google Play Store account following the steps given above,
Create a Google Merchant Account
The next important step you have to follow is to connect the developer account with the Google merchant account in case the application involves in-app purchases. So, you need to click on ‘Set up a merchant account’ to create a merchant account.
Once you are done creating the merchant account, the Google Play Console gets linked to it automatically. Then you can easily monitor, manage, and analyze the app sales.
If you already have an existing account, you just have to go to Download Reports and then over to the Financial section.
Create the App
After you have set up your account, the next step is to create the app. For creating an application, you will have to follow the steps given below.
- Go over to the dashboard and then click on the option ‘All Apps’.
- Click on the option ‘Create App’.
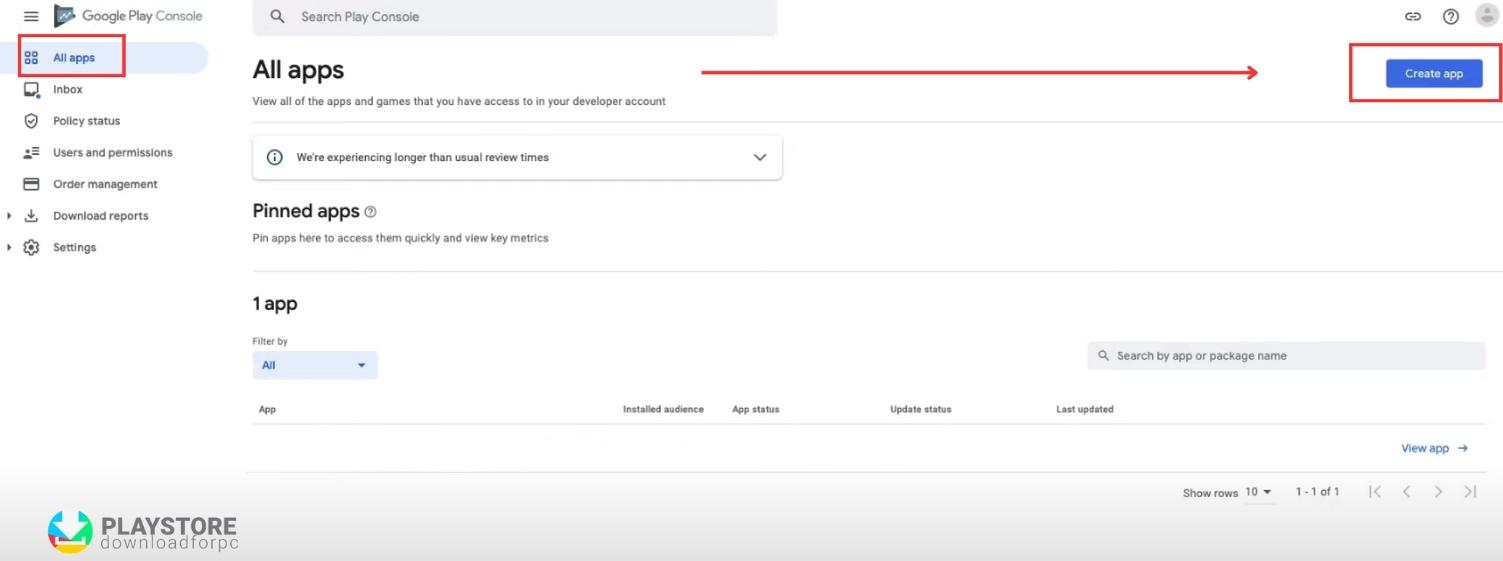
After that, you will have to fill up a few details about the app, such as app name, default language, game or app, and paid or free.
Set Up the App
After that, you are directed to the dashboard of the application where you find the option ‘Set up your app’ after you have scrolled a little. Now, you have to click on the option ‘View Tasks’. One after the other, insert the details about the app.
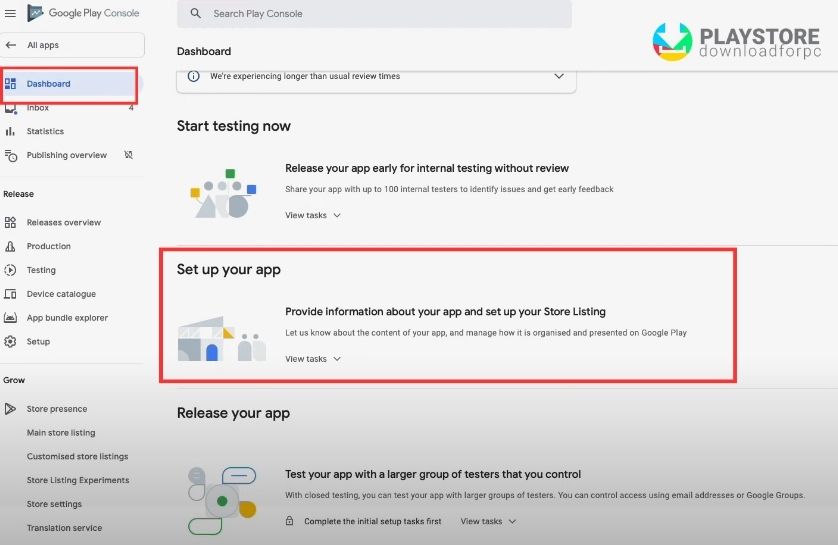
- Set up the privacy policy. Google needs you to add a privacy policy when you publish the app to prevent app violations of privacy.
- You have to mention if the app has access to all its parts or some parts that are restricted for Google to review it.
- You can let Google know in case the app has any ads or not.
- You have to fill out a content rating questionnaire. It is a crucial step since without it, Google marks the app as an underrated one and takes off from Google Play Store.
- When you are done, click on the Next option.
- Next is the Questionnaire section where you will be asked more about the application.
- Make sure that every detail has been filled with the right information and cross-check it in the Summar part. Click on Submit for saving.
- You have to choose the app category and insert the contact details, set up the store listing, app name, short description, and full description.
- After this, you have to upload the graphics of the application, such as screenshots, app icons, and video that will increase user engagement of the application.
Create and Upload the App to the Google Play Store
Go to the option, Release Your App from the dashboard. Here you have to upload the APK to Google Play Console and submit the review before it goes live.
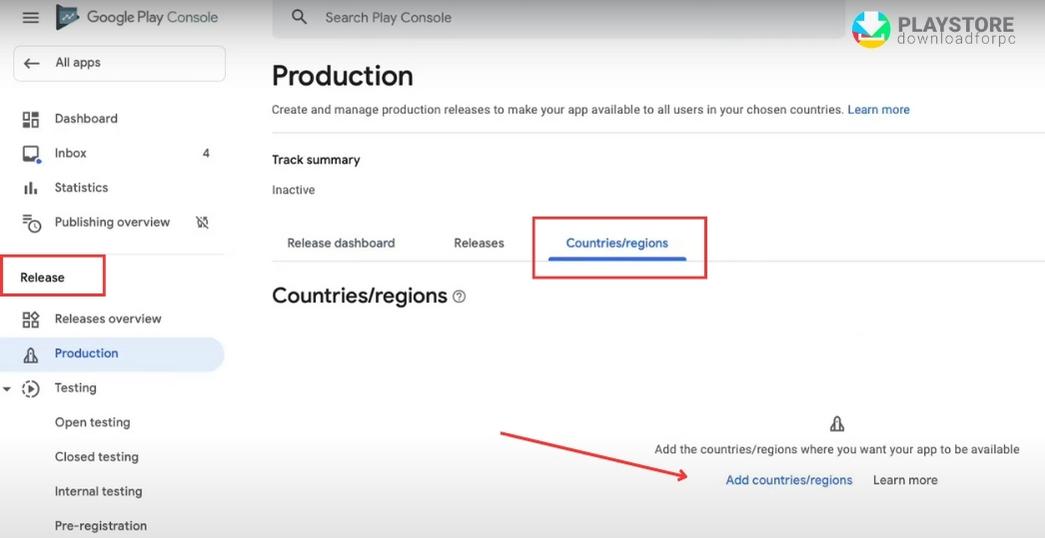
Go over to the option ‘Select Countries and Regions’ and select the countries where you wish the app to be available. Also, choose the type of testing from the ‘Select Testers’ section.
Now, you have to click on the new release and upload the app bundles to fill up the release details. After you have confirmed all the details, add your created app to the platform.
Then you have to follow these steps,
- Go over to App Release.
- Choose to Manage Production.
- Choose Edit release.
- Click on the option Review.
- Then click on the option ‘Start rollout to Production’.
- When you are done, click on ‘Confirm’.
Now, the app has been successfully uploaded.
